The Best way for me to work through different sections of what you are asking is to do a remix (bootleg) of a well known track and show you different ways to do the this that you asked like sampling, cutting, editing, changing tempos etc
...........oh and by the way the reason that i chose this track was because i have seen a famous producer do the same track and i can't find his bootleg anywhere so i thought that this would be a great chance to kill two birds with one stone.
Also if i have not used the correct term for part of logic or if another person can describe something better i'm more than happy to change what i have written so the information can be used more effectively by more people.
Ok so lets get going,
First up i loaded the song into logic, i have a template in logic to make things faster my template is made up off
20 audio (10 for the track and 10 for the stems/tracks of the remix)
10 midi
and some re-wire
after i have loaded the track into logic (in this case it's Vangelis - Blade Runner (End Titles) i want to find out the tempo of the track. The easiest way i have found is to just use the bpm counter in the "metering" plug-in drop down menu.
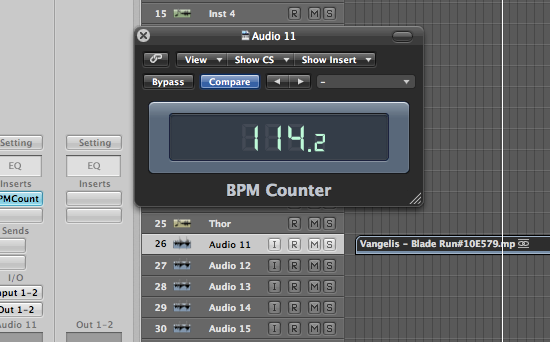
as you can see the original tempo of the track is 114.2 but i want to make this into a dance track for the clubs so later on i'm going to have to increase the tempo to around 125 BPM but ill do that a little later.
Next up we want to go through and find the part of the track that i want to use for my remix. Every song with be different and you will want to use different elements to give different feels to your tracks.
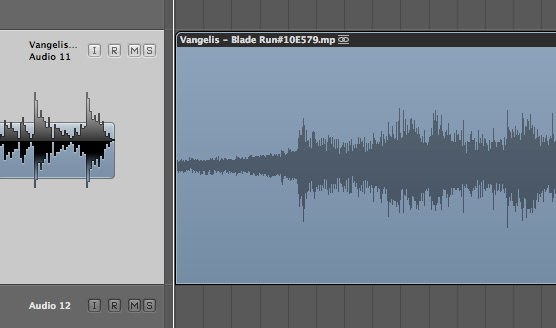
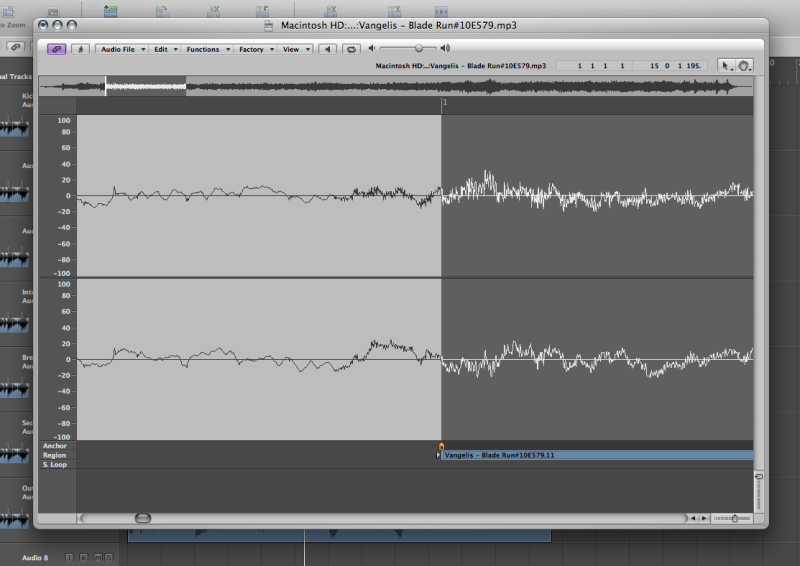
In the picture above you can see the wave form rise up and just at the first transient is were i want to make the first cut to use as my first sample. My method of this is probable not the best but i just zoom in and find the "zero" point where the waveform crosses the "zero" line so you don't get those clicks and pops.
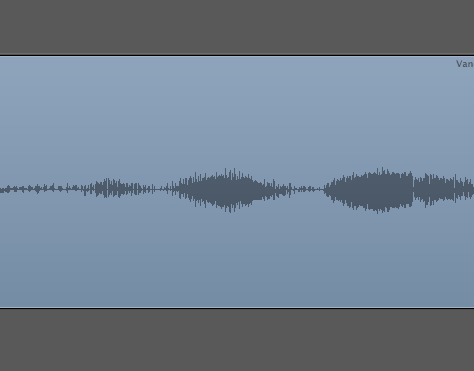
Another method you can use for this is the sample editor (as below) with this you can get greater accuracy with you start and finish times for your samples.
Once i have found all of my samples i'm left with just the following (see below) i found the BPM that the reader gave me was slightly out of time (which can be the case with real instruments) so i just played around with the start and finish times and adjusted the BPM in small increments to bring it back in we need to know the BPM for when we change it in the next step if we are out here you kind of have to start from the start again and chop the samples again.

From here we are ready to change the BPM of each of the samples. You might ask why did we not just find the tempo at the start and then change the tempo of the whole track in one go. Well as we have found out when i cut the samples up the BPM was not 100% also if you have different sample drums, vocals and other instruments you might like to use different settings for each and not apply a universal BPM change to them all.
So if you bring up the sample editor at the bottom of your screen and then click on the "Factory" tab and then go into the "Time and Pitch Machine" tab (see below)
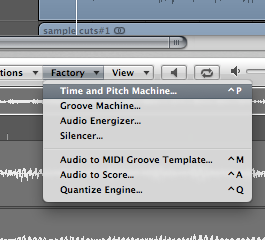
You will see this menu / Function
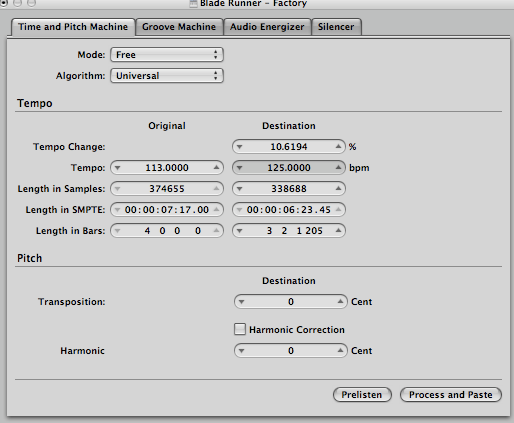
You can see that i have the BPM of the original track (113) and the BPM that we want to shift it to (125) up the top you can see the different modes and algorithm's for different sound (voice, drums, guitar etc) you can try different selections to try and get the best sounding result. Remember that if you change the BPM to much the sample will sound very digital and not really usable.
The next thing i did was change the BPM of the track

Then i imported a kick to make sure the samples are in time
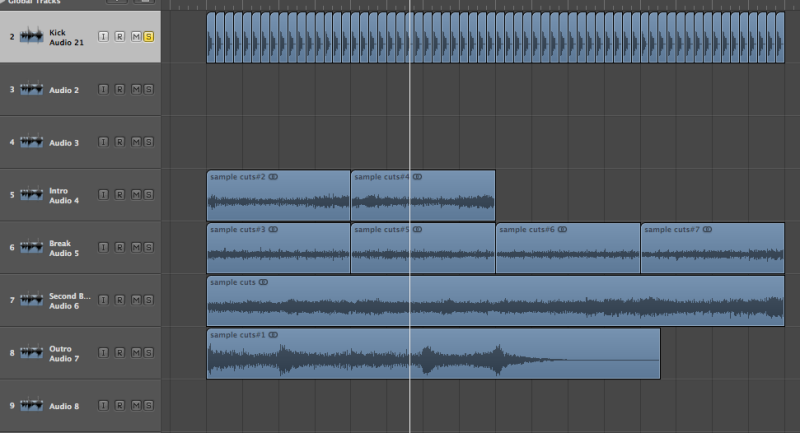
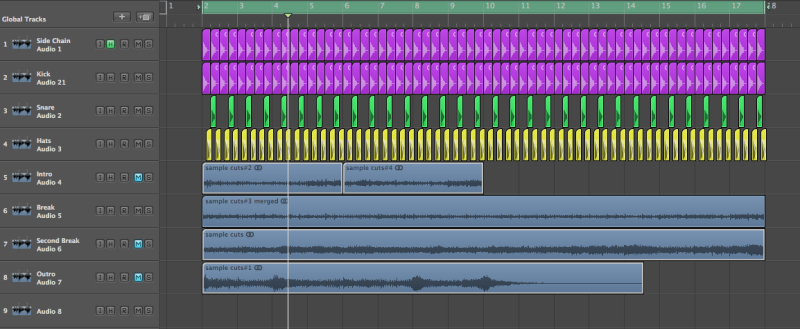
Ok in this next picture you can see that i have added some more percussive elements (snare and hi hats) also on the top line you can see that i have doubled the kick drum. This is for the side-chain function later on in the project. I have kept the drum pattern very simple with four to the floor and the snare on every second kick and the hats on the off beat to the drum. With such a great main line (the blade runner sample) i did not want to make a drum pattern that will take focus away from it. Also you can see that i have the side chain kick hidden just so it is out of the way when i'm making the rest of the track (personal preference) I also try and name each element and have started to color each element to keep everything nice and easy to read.
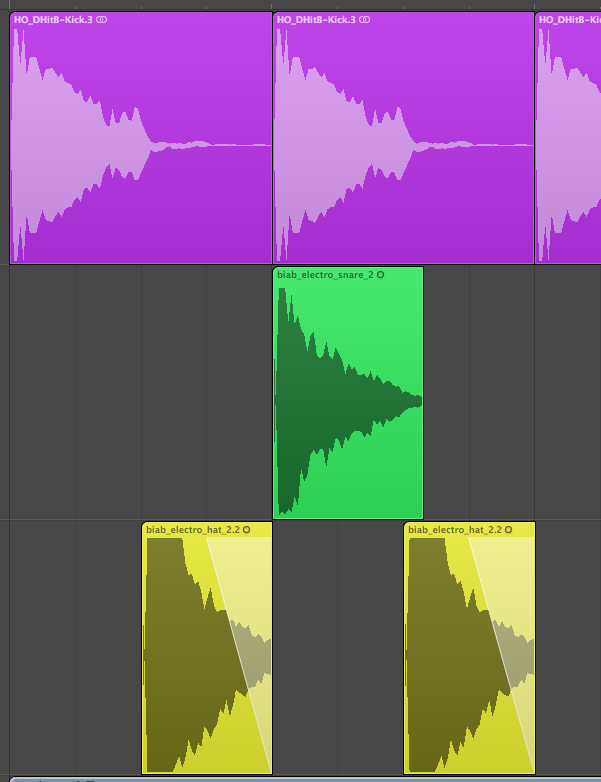
This is a close in picture of the drum pattern and you can se with the snare i have it fading out a little faster i didn't want to just cut the sample i just wanted it to fade out a little faster to give everything else room.
And in this picture you can see the settings for my side-chain kick i have left the level at zero but have taken the output "off" so this will be the trigger to get that pumping sound you hear in a large number of dance tracks today.

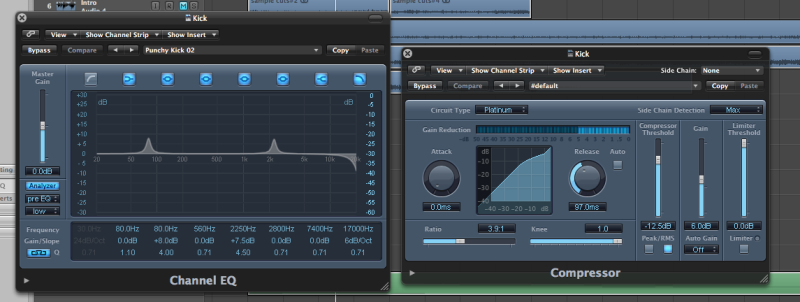
After i have arranged the loop ill go back and start to apply some EQ and compression to each of the sounds. I try and cut all the bass out of non bass instruments / elements to give the bass and kick room. I find that if you EQ each sound you will get a cleaner sound overall and all of the elements of the track will find there own space. In this picture you will see the setting i have for my kick. I have a compressor and EQ on the channel strip. I try and start with a nice kick to start so i don't ned to compress the hell out of it, also i very rarely layer kicks i just try and find a kick that will suit the track. You can see that i have just used the "punchy kick 2" preset and rolled some of the top off the in the EQ. This gives weight to the frequencies around the 80-90Hz and brings out the click in the kick just above 2k. The compression i don't squash the hell out of the kick and i only boost the gain to compensate for the gain reduction.
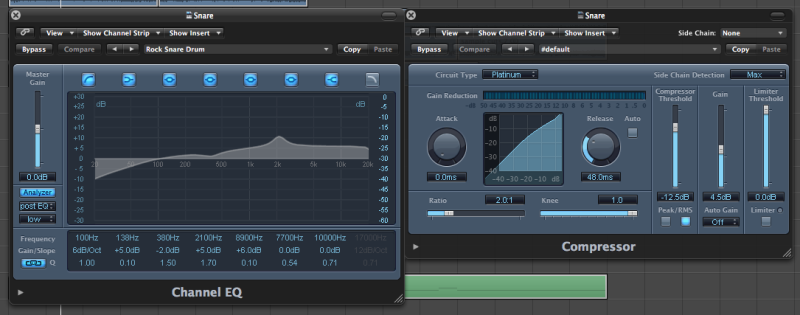
This next picture is the setting i used for the snare i start with the rock snare setting and just tweak it until i get the sound that i want and the compression settings are the just about the same as the kick but i have lowered the ratio and adjusted the gain to compensate for the gain reduction.
Next i have added a tambourine from the apple loops folder. You don't have to have the latest and greatest sample packs to make solid tunes you just have to have good ideas and a vision of where you want the track to go (it's easy on this track because i'm kind of using Mr Benassi's idea hahahahaha)
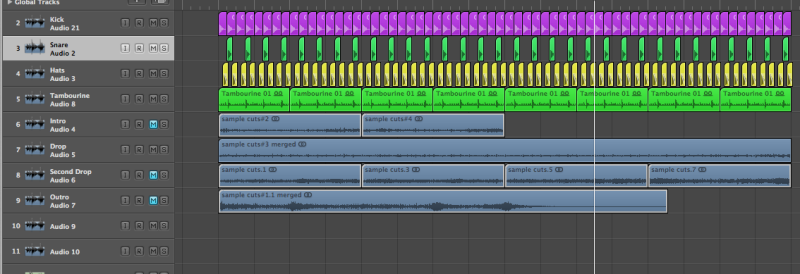
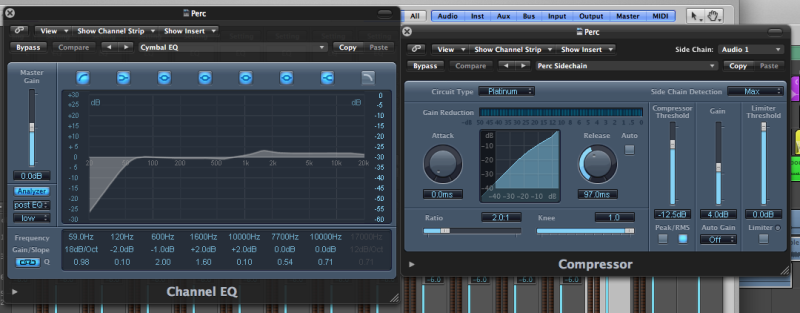
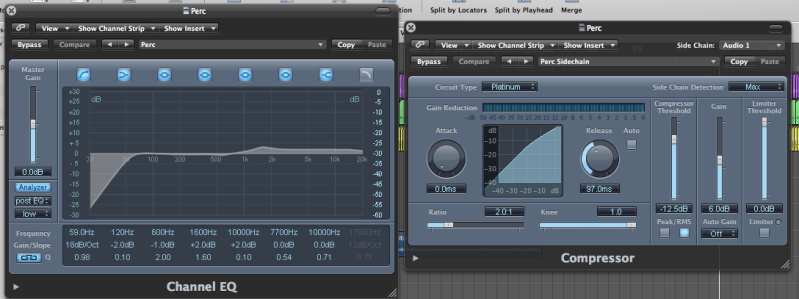
After i have added the tamb i rout the hats and the tamb through to a bus. I like to keep Bus 1-9 free for all my sends and returns like reverbs and delays. So i run the percussive elements trough Bus 9 and on the channel strip i placed a EQ and started with the cymbal setting and then the same as the other settings just tweaked it until i found the sound that i was after. Also i have saved a setting for "perc side-chain" this is the side chain setting that i used for hats, tamb and other elements of that nature.
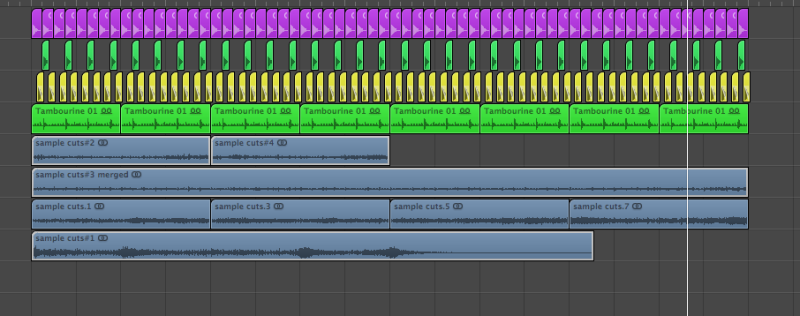
One other thing that i forgot to mention was that i used the same technique to the longer sample as i did with the previous one. By cutting the sample at every four bars and making sure that the sample come in right on the start of the down beat you make sure that the sample is in time through out the whole 16 bars.

so this is how the project looks at this stage of the remix.
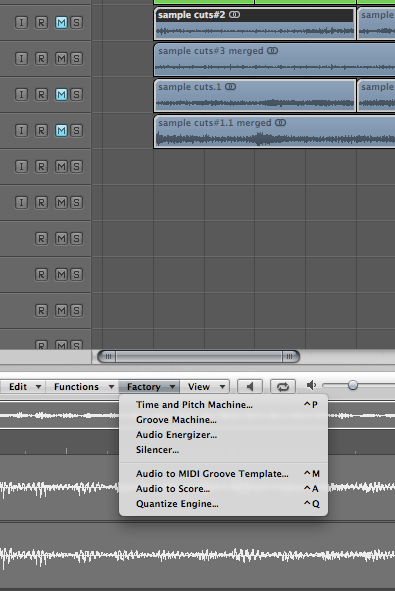
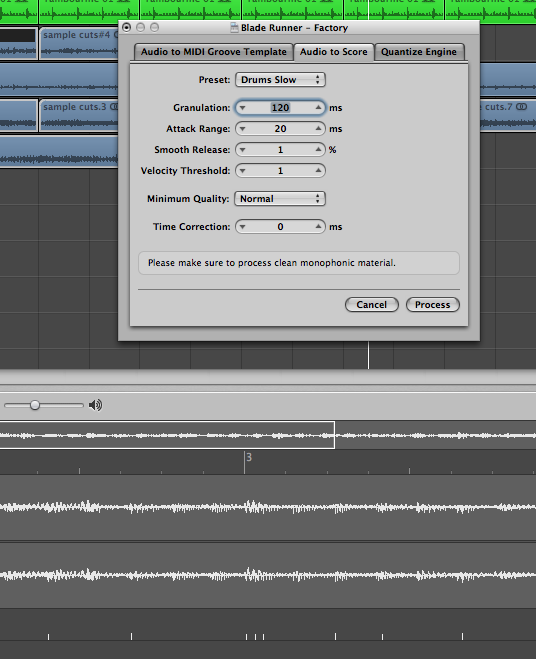
Next up is one of the main parts of the dance track, the bass. There is a couple of different ways to find out what notes are being played. One of the ways that i use a large amount of the time (because i'm super lazy) is to use the audio to score function. This method is only really any good when you get the individual parts to a track (drums, bass, vocal etc) but i will show you where it is for future productions. You can see in the first picture that i have selected the sample that i want to find out the notes for and double clicked it to bring it up in the sample editor at the bottom of the screen. From there go to the Factory tab and select the "Audio to Score" function. Then you will be greeted by the audio to score window (picture two) from this you can select one of the presets to start with and change the different values to get the desired effect. You can see the lines at the bottom of picture two. This is where logic is gathering it's information (notes) from so if you adjust the vales you can make it more or less sensitive depending on the piece (sample) you are working with. This being a bootleg and not have a clean bass line it will not really work, but it's still good to know. If you do have a clean bass line and you use this function it is a great starting point to match the bass line as it turns the notes into midi and with a couple of adjustments you will be will on your way to making a great bass line thats in key with the original track.
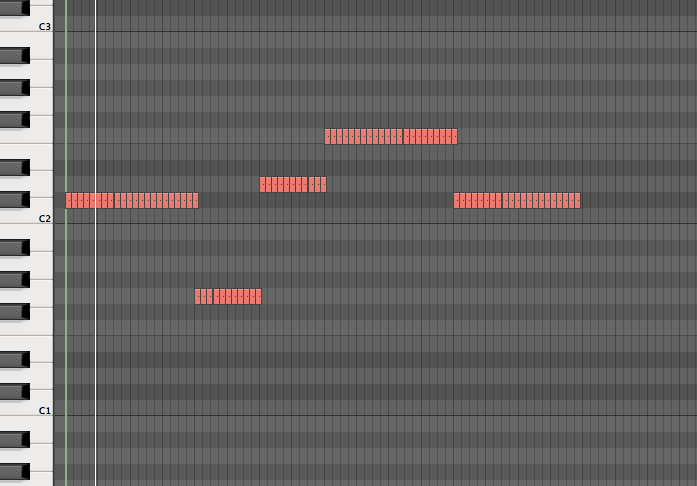
When i'm trying to find out a bass line i normally load up the ES1 and then load the "producer bass" patch i find that this is a great patch as it does not have effects of a super sub bass part it's just a simple bass patch that you can play over just about any track (playing along to find the notes) and it will not over power what you are playing along with. here is the notes that i worked out as you can see i didn't follow each of the changes in the sample i selected. I try and keep the bass line simple so when you play it out it drives the track along with the kick. A complex bass line can be a little to much for the kids to handle and they don't really get it. Remember we are making dance music we are not trying to remake the score to Blade Runner hahahahahaha.
Ok I know it has been some time since my last post but trying to move country and finish of some of my own tracks take up a little bit of m time hahahahaha. I didn't write this part of the walk through as i made the track due to time and what not, but enough about that lets get on with what i did.
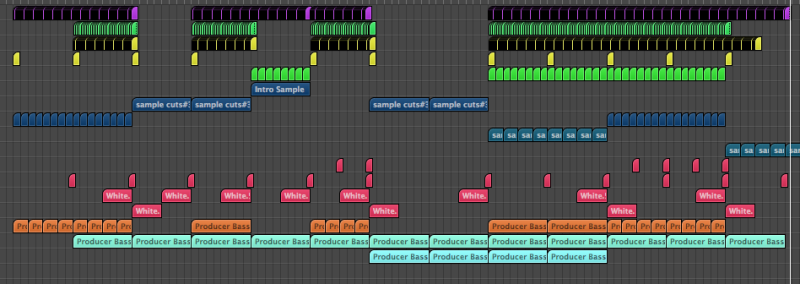
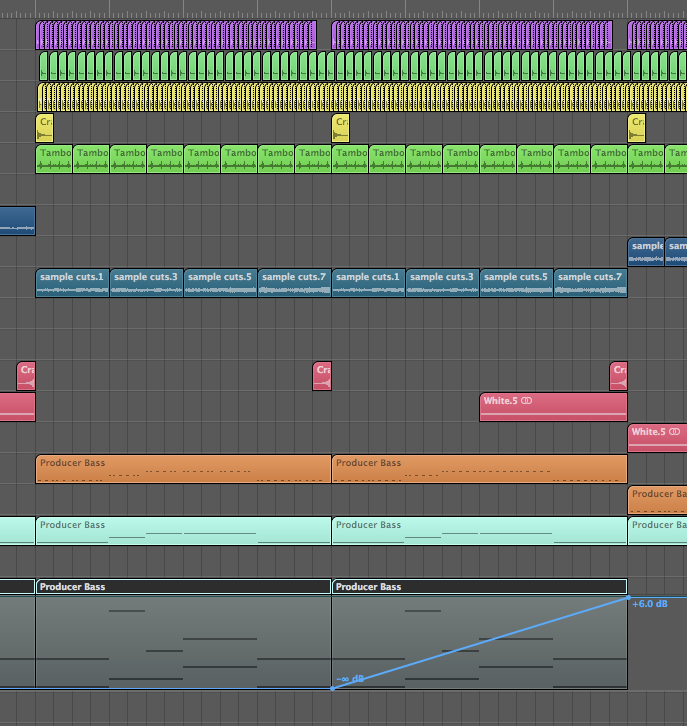
first off we have a picture of the arrangement as it stands now i have tried to keep it all color coded as follows
Purple - Kick
Mint green (Second From Top) - Snare
Light Green (Fifth from top) - Tamb
Yellow - Cymbals
Teal (Blue) - Original Samples
Salmon - FX eg white noise, reverse crash
Orange - Bass
Light Blue - Arp & Pad
First ill talk about the intro
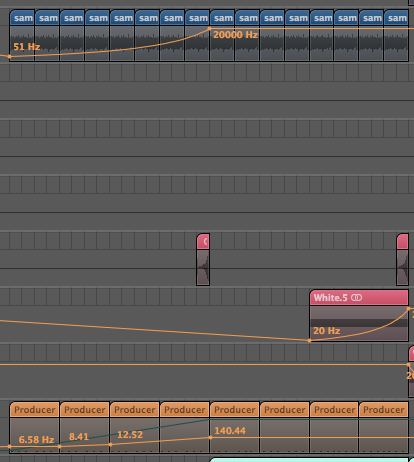
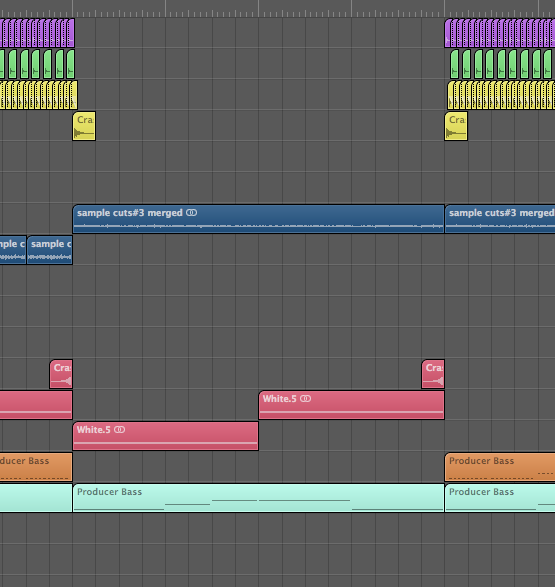
I tend to keep my intros around about 1mins (give or take with the bpm) I have started my arrangement at bar 17. This is so it gives me room to work on loops and what not to the left of the arrangement. All i have for the intro is kick, bass, original sample and a crash. The only FX i'm running apart from the normal eq compression is a tape delay of the crash which is set to quarter note with feedback set to around 50. As you can see in the second picture i have a little bit of automation going on. The original sample just has a lowpass filter on it bringing in the sound over the first 30sec or 16 bars. Also i automated the main bass cut off over the same period of time so when the second crash hits and the snare, hats and arp come in (picture 1) both the original sample and the bass are opened up.
Now i know that i was going to just use logic plug-ins but i just purchased Sylenth1 and really really really wanted to use it, and because this is my tutorial i did
For the arp sound i just used the Blade runner patch in sylenth1 which sounds like the original cool hey. I used this to just bulk up the sound of the original sample to try and bring it in line with todays dance tracks (loud) for the bass patch i just made a simple dual sawtooth patch and routed the velocity to the cut off.
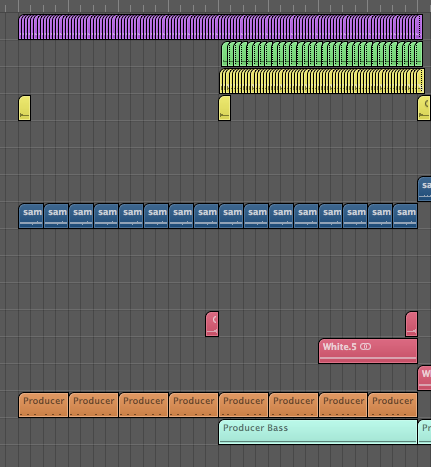
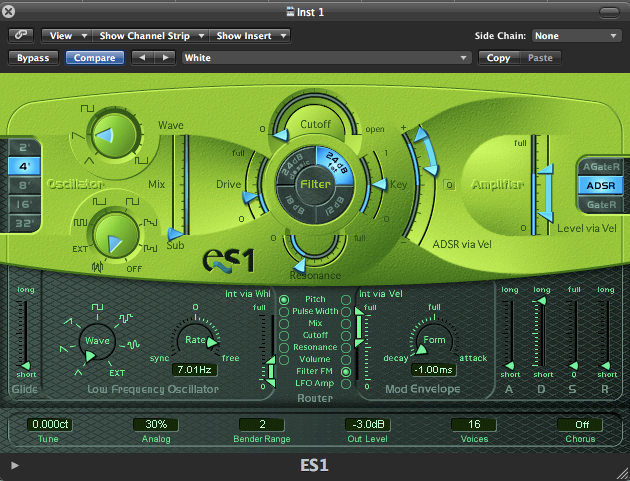
the only other two samples in the intro are the reverse crash halfway through the intro and at the end of the intro and the white noise FX. For the white noise i just used a ES1 with the following settings. All i did then was set the cut off to open played the midi for 8 bars and then bounced it down to audio. I then place a the follow plug-in chain on it. I put the Reverb on to add some more space, a Eq next to eq the sample and the reverb compressor with the same settings as i had for the perc. and a lowpass filter to open the sound up for the transition.

For the first break-down i just have the original sample playing over the 16 bars. As you can see i have another white noise sample used as a really long crash so the original sample can come in underneath. I also have the same crash with the same tape delay and i also have the arp playing along with the arp in the original sample. I'm yet to apply any filters on the original sample during this part i'm still getting all of the track to sit and drive along. All of the original sample plug-in strips look like this (second picture) The eq is just boosted to bring parts of the sample out and the compressor settings are the same as the "perc side chain" setting (Back up the page) but with less threshold so the sample pumps along with the side chain but trying not to overdo it.

Ok now that i have finished packing all my gear to move to LA i have found some time to do some more of the tutorial thanks for the comments from people who are reading along.
So next i'm going to talk about the first drop the middle of the middle and then the lead into the second break.
First up we have the drop as you can see the original sample gets played again as with the arp. In addition to these we have the kick, snare, hats and bass all coming in. Lastly i have also added the crash on the first beat with the tape delay on it (as previous mentioned) Im yet to apply any changes to the cut off of the bass or added any filters to the sample (low or high) as you can see i have another white noise sample with a low pass filter automation on it as a build FX and a reverse crash the two being used as a transition FX. I find that it's good to use the two as one is a longer build that creeps up on you and the reverse crash provides a suck in FX. I find that if you get the right samples it kind of sucks you into the next part of the track.
Other parts to mention the arp and the bass are playing along with the sample i find that the bass line and the arp are being used to make the sample sound bigger not really adding anything next just making it bigger to be played at the clubs and what not.
The next section is the kind of middle of the middle. As you can see in the picture the sample has changed. I know that it says "intro sample" but it's not the sample i used for the intro it's the sample of the original intro. It has the arp playing the one note throughout so i have my arp doing the same thing. i have striped this section of the snare, hats and bass. At this point of building the track i don't want to just keep adding more and more elements to keep it progressing so i have chosen to to the opposite and strip some it may or may not stay like this but for now its a good change. Again i have the white noise sample doing the same thing and also the reverse crash. i have taken out the last four beats just to see how it sounds as a added part to the transition again the may or may not stay that way. Also some other things to note i didnt have a crash on the first beat because i wanted it to feel a little more stripped down for this part and i added a tambourine loop which is sent to the percussion bus, i have also sent the hats here to. The setting are as follows (see pics below for reference) The eq i have rolled of the bottom because you want to give each sound its own space and the best way i find to do it is to roll off any unneeded freq's for each sound. For example you don't need low bass freq's for hi hats so apply a eq and roll them off this also helps if your mixes sound muddy tr and shape each sound so your samples sound nice and clean. I have boosted the top end a little just to give the samples a little more air and make them sound a little brighter. The compressor settings are the same as previously mentioned and side chained to the kick to.
The next part you can see that i don't have any of the original sample playing just the parts i have added but the notes being played are the same as the notes in the original sample. The only parts i have from the original are small parts of the timpani drums in the middle of the third section and at the end of the third section. just to break up the part, i use them as a fill to add a little interest in the section. Again i have the white noise and reverse hat at the end of the section. I also have taken the last four beats of the kick out.
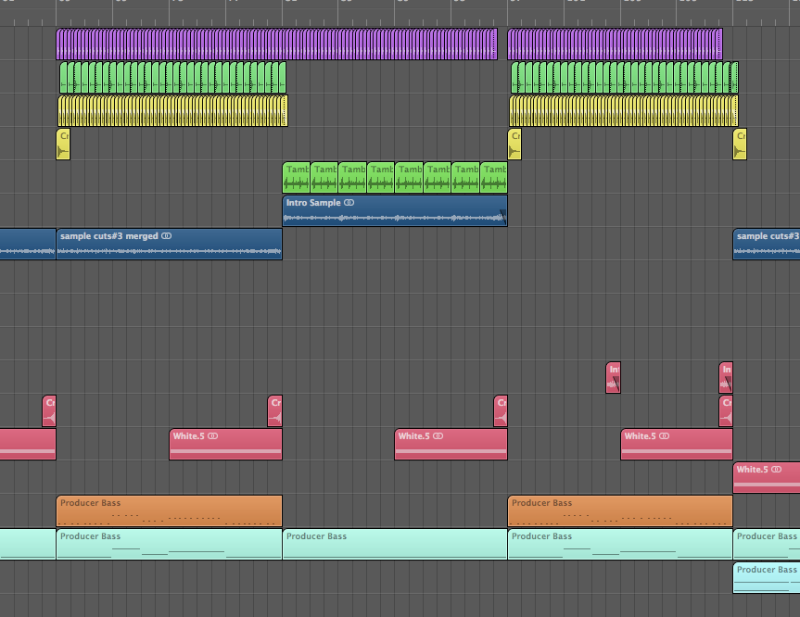

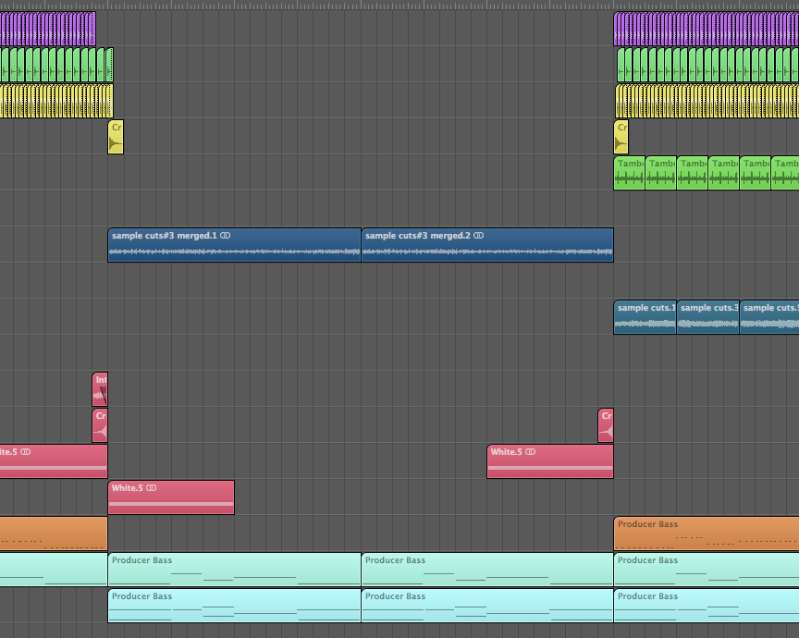
Next we have the second break. The original sample i used was the same as used in the first break and drop. I still have the arp like in the first break the only difference is that i have added a pad. For the pad i'm just using a two note chord (dyad) I have the levels so nothing takes away from the original sample. I have a white noise used as a lead in and white noise used as a build. At this point i don't have any filters on the original sample i'm still just finding what works in what section.
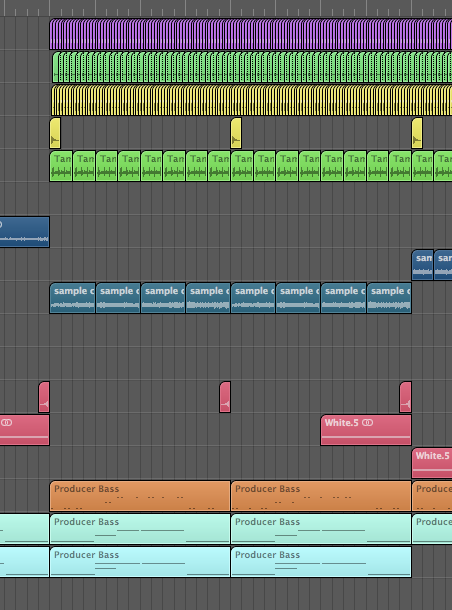
The next section i would call the second drop. This is the part of the track that is normally fully built all the samples are in for full effect if i'm making a big club track ill try and build the second break so when the drop comes in it's like a slap in the face it really hits you and lets you know that the track is in full effect. It does not always work but it's what i go for on most tracks again this is what i try and achieve.
You can see from the photo that we have the bass arp and pad all playing as well as the kick, snare, hats and tamb also one other thing to note is the sample of the original track i used is from later on in the original. I chose this part because it has more body than the first and i really really love the sound of this section. Again i use the white noise and the reverse crash as a transition from section to section and i have crashes in there with the same tape delay added as mentioned earlier. All the midi parts (the bit i added) follow the original sample.
The next part we have is the outro. For the original sample i used the same sample i used for the intro (before the first break) i have stripped the pad away and the bass and arp again follow the original sample. I use the white noise at the start and the end of this section and i break it up by using the timpani drums like i did earlier on in the track.
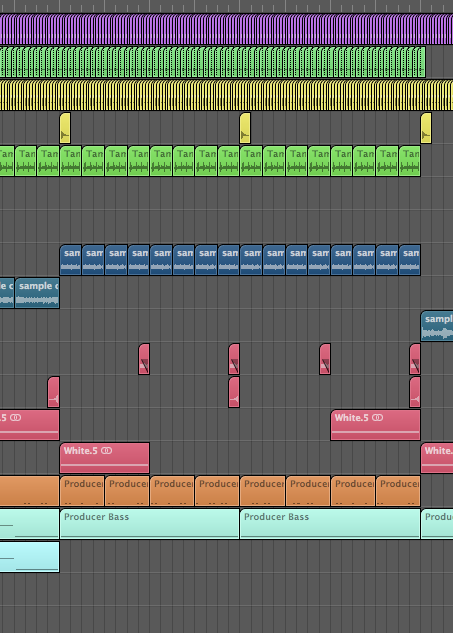
Lastly we have the finish of the track. For the original sample i used the outro from the original, it's cut into four so i could tighten the part up to make it fit (like i did with the rest of the samples) I have striped away the bass, tamb, snare and halfway through i strip away the hats also. Yet again i use the white noise and reverse crash as transitions.
From here ill be going back and working on each section to try and make it all fit and all sound the best it can. I will show you what i do to add variation to my tracks and some tricks that i use to keep people listening and keep them dancing
There is more on the way just have to find some more time but i will get there!!!!
Ok it's been some time. Since my last post i have moved country, had my first release, had my only means of making music (my laptop, the rest of my gear is on a slow boat) break down and i just about lost all of the last four mths work (not cool) had my first release and best of all got a two year record deal (happy days)
Enough of me going on and on, lets get back to the task at hand.
OK so now that i have the general layout of the track i tend to try and go back to each section (intro, first break, first drop etc) and try and maximize them to give the greatest dynamic in the music. You don't want each section to have no movement in it otherwise it will be stale and predictable.
For the into (32 bars) i break it down into 2 x 16 bars. As you can see and i described earlier the intro opens with the sample that is looped the kick and the bass. The sample has a low pass filter on it which opens up over the course of the 16 bars also the bass opens the cut off filter over the same time. This builds the tension in the track building the track so when the hats, arp and snare come in it's like a bit of a slap in the face. Once the other elements come into the track i send the sample to the long reverb bus and i open that up to the maximum by the time the first break. I have done this on this track for a couple of reasons again i think that in this instance it builds tension, it also acts as a great transition with the tail of the reverb flowing on into the first break. The reason i have this as a send and not just as a reverb on the channel is because i wanted to keep the original sound in the track and i didn't wanted it to sound like a sea of white noise overpowering the rest of the elements by the end of the intro.
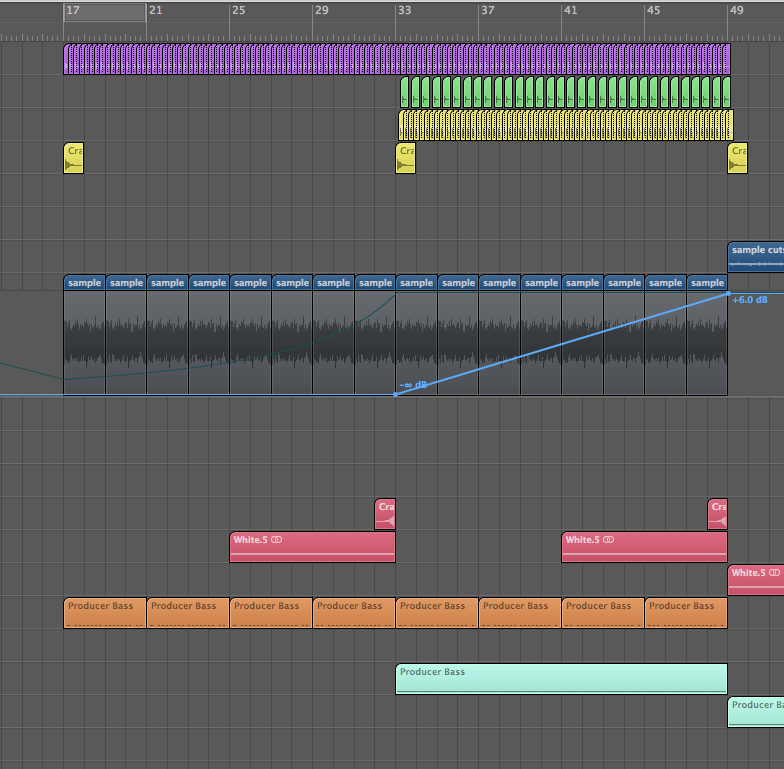
The next section is the first break. I Applied a low pass filter to the sample and the arp (which is named producer bass in the picture below hahahahaha) I have done this so the sound swells up underneath the reverb tail of the FX send from the into and the white noise. Also the crash cymbal carry through the first section of the first break. I open the sample and arp over the first half of the break. I have the break striped back with the elements but the only element that i have that builds the track is the white noise. I wanted the transition from the break to the drop to be a smooth one. I did this so the second drop is more powerful .
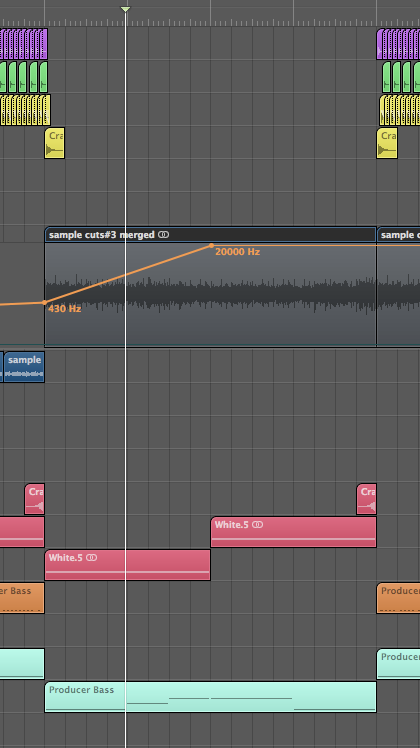
The next section is the drop (the start of the middle) al you can see i have the sample again sent to the reverb FX. I have done this for the same reason as before to build tension in the track and to have the reverb tail blend into the change in the track.
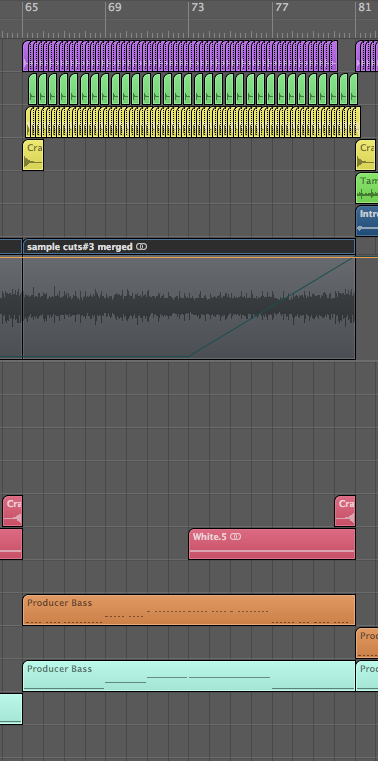
Again i used this same method in the next section (middle of the middle) and at the end of the middle section i strip away all the original elements to leave the new additions to the track (the elements i added) Also in the middle section i have a low pass and high pass filter on the main bass line that opens up over the course of the middle section also i closed the cut off filter at the start of the middle of the middle (bar 81) and open it up from bar 81-bar 97. I place the two filters and the cut off filter automation on the bass because i want the bass to creep in slowly.
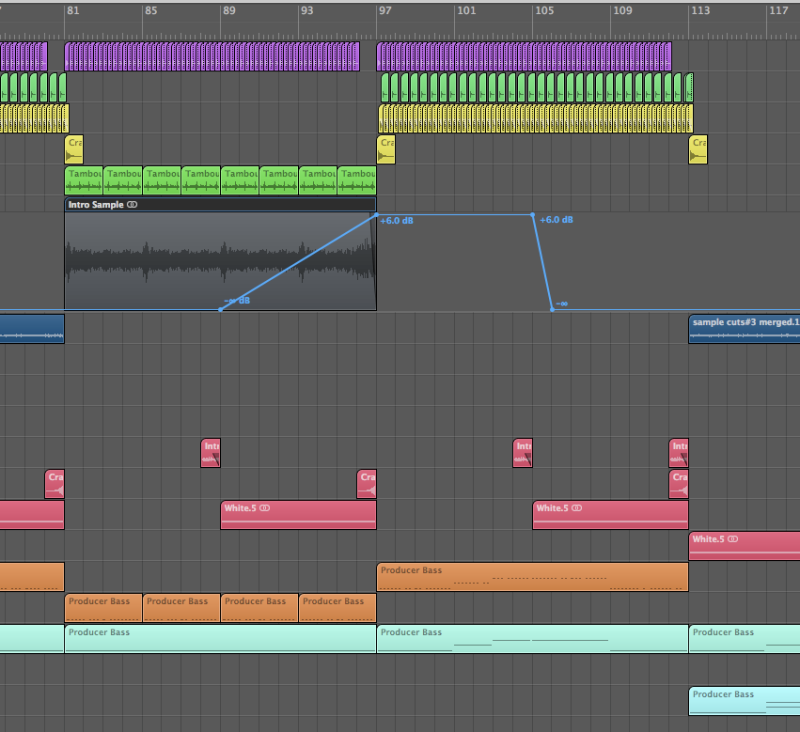
The next section is the second break. I have placed a lowpass filter on the arp, original sample and pad (which is the new element) again i wanted the sound of all three of these elements to build up as the break progresses. Also you can see that i have sent the original sample to the long reverb FX bus to build the second part of the second drop again. You can also see that the arp in on another track i have done this because some times in logic if you have automation starting on a beat/bar or just a precise point in the track that there can be a little lead or lag in the automation so to get over this problem i copy the track and just put the midi/audio region on the new track so the automation will be precise. I'm not sure yet but i might also drop the overall volume down a fraction in this section and have a sharp rise just at the end to add to the build before the drop.
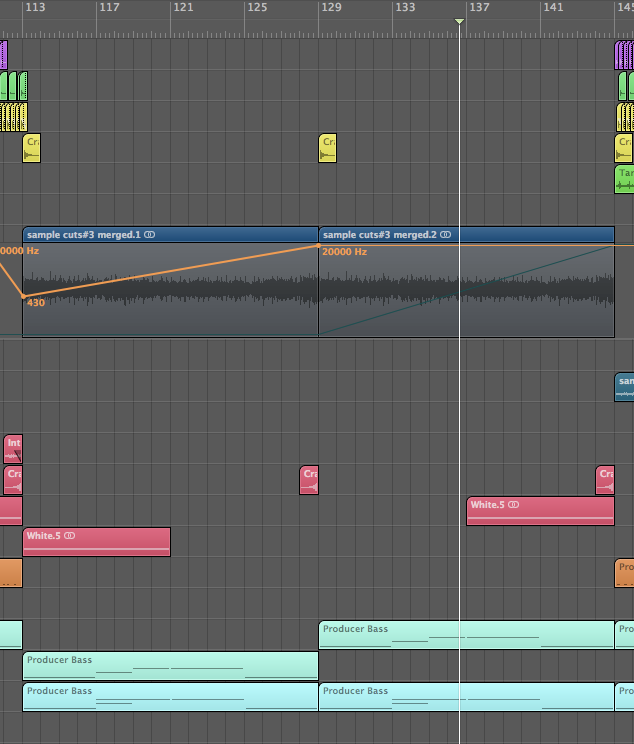
For the second drop i keep it pretty simple as to let the original sample move the track. In the second half of the drop you can see i have sent the pad to the long reverb FX i have also done this to the original sample. I did this as the last little build in the track before the outro and again the reverb tail helps with the transition in the track.
